A cracked or damaged door can compromise your home’s security, energy efficiency, and aesthetic appeal. Whether you’re dealing with minor cracks or major structural issues, understanding the process of repair and replacement is essential. This guide will walk you through the necessary steps to restore functionality and appearance to your door.
Assessing the Damage
- Surface cracks
- Warping or swelling
- Holes or gouges
Minor surface damage may only require basic tools and materials for repair, while severe structural issues might necessitate full replacement.
Tools and Materials You’ll Need
For Repairs: – Sandpaper (medium and fine grit) – Wood filler or epoxy resin – Putty knife – Paintbrushes – Primer and paint (or stain)
For Replacement: – Measuring tape – Screwdriver set or power drill – Hammer and nails – Replacement door slab – Hinges (if needed)
Optional: A chisel, utility knife, level, sealant, weatherstripping
Repairing a Cracked Door
- Clean and Prepare: Wipe down the damaged area with a clean cloth to remove dirt or debris.
- Sand the Area: Use medium-grit sandpaper to smooth out rough edges around the crack.
- Apply wood filler for shallow cracks.
- For deeper cracks, consider using epoxy resin for extra durability.
- Once dry, sand down any excess filler until flush with the surrounding surface.
- Apply primer first to seal repairs.
- Repaint or stain as desired for a seamless finish.
Replacing a Damaged Door
When repairs aren’t feasible due to extensive damage—such as warping beyond repair—it’s time for a replacement.
- Measure Accurately: Measure your current door’s height, width, thickness, and placement of hinges before purchasing a new one.
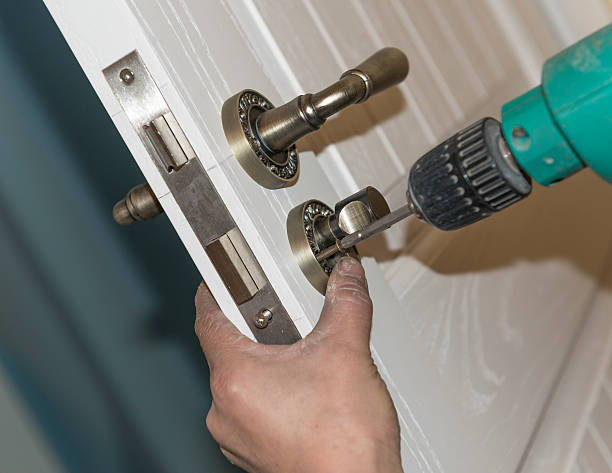
- Remove Existing Door: Unscrew hinges from both sides of the frame with care and detach hardware such as knobs.
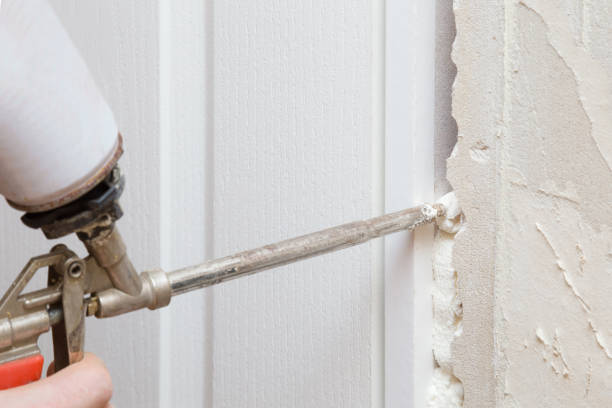
- Prepare Frame: Inspect for damages in surrounding frames; use caulk/sealant where necessary if gaps are found along edges.
- Install New Door Slab: Align hinge points correctly before reattaching screws securely into pre-drilled areas based on measurements gathered earlier.
5 . Adjust Alignment After hung-in ensure hinge tightness
Step-by-Step Process for Fixing and Repainting Cracked Wood Doors in Rockville, MD
Repairing and repainting a cracked wooden door can restore its functionality and appearance, saving you the cost of purchasing a new one. Follow this detailed process to achieve professional-looking results.
1. Assess the Damage
Before starting any repairs, evaluate the extent of the damage on your door. Look out for:
– Cracks or splits in the wood
– Peeling or chipped paint
– Structural issues such as warped sections or loose hinges
Understanding the severity of the damage will help you decide whether a full replacement is necessary or if repair work will suffice. Minor cracks and surface issues can typically be resolved with basic tools and materials.
2. Gather Essential Tools and Materials
| Tools | Materials |
| Sandpaper (medium & fine grit) | Wood filler/epoxy resin |
| Putty knife | Primer |
| Paint scraper | Paint (latex or oil-based) |
| Screwdriver | Wood glue |
| Paintbrush/roller | Sealant (optional) |
Ensure all tools are in good condition before starting to avoid delays during the repair process.
3. Repairing Cracks in the Door
- Clean the Surface: Remove dirt, dust, and loose paint around the crack using sandpaper or a paint scraper. This ensures better adhesion for repairs.
- Apply Wood Filler or Epoxy Resin: Use a putty knife to fill cracks with wood filler or epoxy resin, pressing it firmly into gaps to create an even surface.
- Sand Smooth: Once dry, sand down any excess filler to ensure it blends seamlessly with the surrounding area.
For larger cracks, consider using wood glue combined with clamps to secure split sections until fully cured.
4. Prepping for Repainting
- Remove Hardware: Detach door handles, hinges, and locks to protect them from paint splatters.
- Sand Thoroughly: Use medium-grit sandpaper to remove old paint layers and fine-grit sandpaper to smooth surfaces.
- Clean Again: Wipe down your door with a damp cloth to eliminate dust created during sanding.
Priming is essential before painting because it helps seal porous surfaces while improving paint adhesion.
5. Repainting Your Door
- Apply Primer: Use a high-quality primer tailored for wood surfaces.
- Paint Evenly: Apply two coats of paint using either a roller (for broad areas) or brushes (for trims). Allow each coat adequate drying time as per manufacturer instructions.
- Seal if Necessary: For added durability against weather changes or wear-and-tear indoors, apply a clear sealant over dried paint.
When complete, reinstall hardware carefully.
Proper maintenance after repairing your wooden door can prolong its lifespan—regularly check for signs of wear and address small issues promptly before they escalate into major problems.
Enhance Your Home with Professional Door Installation Rockville, MD
Replacing or installing high-quality doors is one of the most effective ways to enhance your home’s functionality, security, and aesthetic appeal. Whether you’re upgrading outdated doors or adding new ones to a renovation project, the process can have a significant impact on your home’s overall value and comfort. Below is a guide to help you understand the benefits of high-quality doors, factors to consider when selecting them, and how to ensure a successful installation.
Top Benefits of Professional Door Repair Rockville, MD Services
- Quality doors often provide better insulation, reducing heat transfer and lowering energy bills.
- Look for options with energy-efficient certifications such as ENERGY STAR ratings.
- High-quality materials like solid wood or steel provide superior resistance to forceful entry.
- Modern designs often incorporate advanced locking mechanisms for added safety.
- Premium doors are built from materials that resist warping, cracking, and fading over time.
- They require less maintenance compared to cheaper alternatives.
- A well-crafted door enhances curb appeal and complements the architectural style of your home.
- Customizable options allow you to match the door’s finish, hardware, and design with your personal taste.
Factors to Consider When Selecting New Doors
| Factor | Description |
| Material | Wood offers timeless beauty; fiberglass provides durability; steel ensures maximum security. |
| Style & Design | Options include panel doors, French doors, sliding glass doors, etc., depending on location and purpose. |
| Door Swing Direction | Determine whether an in-swing or out-swing design best suits each doorway’s layout. |
| Size & Dimensions | Accurate measurements are essential for ensuring a proper fit without gaps or drafts. |
| Budget | Balance cost with long-term value—invest in quality rather than opting for the cheapest option. |
Tips for Installing High-Quality Doors
- Prepare Thoroughly: Ensure the door frame is square and level before starting installation.
- Use Appropriate Tools: Common tools include a level, power drill, screws, shims, caulk gun, and measuring tape.
- Install Weatherstripping: This helps seal gaps around the door edges for increased insulation.
- Hire Professionals When Necessary: For complex installations (e.g., custom exterior doors), professional expertise ensures precision.
Replacing or installing superior-quality doors not only updates your home’s appearance but also improves comfort and functionality over time. By carefully selecting materials and designs that suit your needs—and ensuring precise installation—you can achieve an upgrade that lasts for years while enhancing your daily living experience.
Enhance Your Home with Services from a Trusted Door Company in Rockville, MD
Replacing or installing high-quality doors is an excellent way to enhance the aesthetics, functionality, and value of your home. Well-designed doors not only improve the overall appearance of your living spaces but also provide better insulation, security, and durability. If you are looking for professional door installation services in Rockville, MD go to https://www.novaexteriors.com/rockville-door.
Below is a detailed guide to help you upgrade your home with high-quality doors.
Benefits of High-Quality Doors
- Improved Curb Appeal:
A premium door design can instantly elevate the visual appeal of your home’s exterior and interior. - Enhanced Security:
High-quality doors are typically built with stronger materials, making them more resistant to forced entry. - Better Energy Efficiency:
Insulated doors help reduce energy costs by preventing drafts and maintaining indoor temperatures. - Durability:
Superior materials ensure that these doors last longer with minimal wear and tear. - Increased Property Value:
Investing in quality doors can boost your home’s resale value as they are seen as a desirable feature by potential buyers.
Types of High-Quality Doors
| Door Type | Material Options | Key Features |
| Entry Doors | Wood, Steel, Fiberglass | Weather-resistant, strong security |
| Interior Doors | Solid Wood, MDF | Noise reduction, aesthetic design |
| Sliding Glass Doors | Glass with Metal Frame | Space-saving, allows natural light |
| French Doors | Glass with Wood/Steel Frame | Elegant look, indoor-outdoor connection |
Steps for Replacing or Installing a High-Quality Door
- Use a measuring tape to record accurate dimensions (height, width, and depth) of the door opening.
- Verify that the new door matches the measurements for a proper fit.
- Unscrew the hinges carefully using a drill or screwdriver.
- Detach any hardware such as locks or knobs from the old door.
- Remove old weatherstripping if present.
- Inspect the frame for any damage like cracks or rot.
- Repair imperfections using wood filler or replace damaged sections entirely.
- Clean the surface thoroughly before proceeding further.
- Attach hinges to both the new door and its corresponding frame.
- Ensure they are aligned correctly to allow smooth operation.
- Position the new door into place within the frame.
- Secure it by tightening screws on hinges using a drill.
- Open and close your newly installed door several times to check alignment.
- Make adjustments if necessary by slightly loosening screws or repositioning hinges.
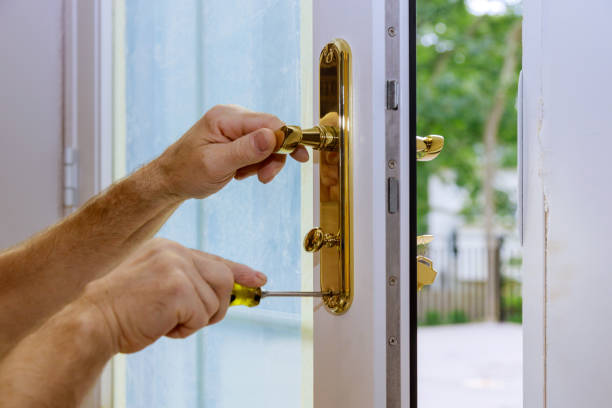
- Install locks, handles, knobs, or decorative hardware.
- Apply weatherstripping along edges for insulation benefits if it’s an exterior door.
Tips for Choosing a High-Quality Door
- Opt for durable materials like solid wood or fiberglass for longevity.
- Look into energy-efficient designs with insulating cores to save on utility bills.
- Choose finishes that complement your home’s existing décor (e.g., stained wood tones vs sleek painted styles).
- Prioritize brands known for craftsmanship and quality warranties.
By replacing outdated models with premium options tailored to your needs, you’ll enjoy improved functionality while enhancing both comfort and style throughout your space.
Essential Tools and Materials Needed for a Successful Door Installation
Installing a door requires careful preparation, the right tools, and the appropriate materials to ensure a smooth, professional result. Whether you are replacing an old door or installing a new one, having the necessary items on hand can save time and reduce the risk of errors. Below is an overview of essential tools and materials to guide you through the process.
Tools Required for Door Installation
- Measuring Tape
Accurate measurements are critical to ensure the door fits perfectly within the frame. - Level
A level helps confirm that both your door frame and door are properly aligned. - Circular Saw or Hand Saw
These will help trim either the door or framing materials if adjustments are needed. - Chisels
Used for creating recesses for hinges in both the door slab and frame. - Screwdrivers (manual or electric)
Necessary for securing screws into hinges, locks, and other hardware. - Drill with Drill Bits
Ideal for pre-drilling holes before inserting screws to prevent splitting. - Hammer and Nails
Useful for securing trim or other elements of your installation. - Utility Knife
Helps with scoring caulk, trimming shims, or making precise cuts in small areas. - Pry Bar
Handy for removing old doors, moldings, or nails without damaging surrounding areas. - Clamps (optional)
These can provide added stability when attaching components during assembly.
Materials You’ll Need
- Choose a high-quality material such as solid wood, fiberglass, steel, or composite based on your needs.
- Ensure it matches your preferred style (e.g., panel pattern) and dimensions.
- If replacing damaged frames, consider pre-hung options for easier installation.
- Look for durable wood species like oak or pine if building from scratch.
- Select hinges that match your aesthetic preferences while offering durability; brass, stainless steel, or powder-coated finishes work well in most cases.
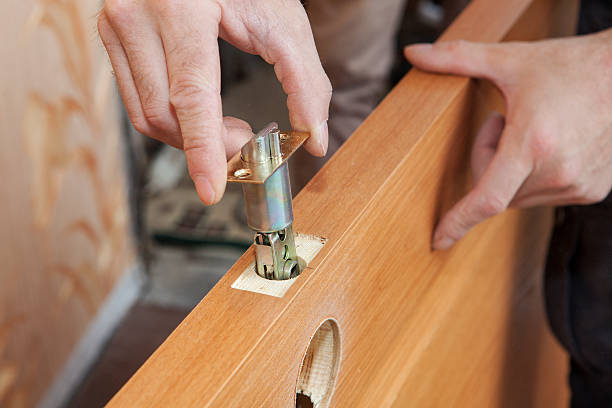
- This includes doorknobs/leversets, deadbolts (if applicable), latch plates, strike plates.
- Wooden wedges used to level out uneven spaces between the doorframe edges during alignment adjustments.
- Sealants/Caulk: Sealing around gaps improves insulation quality once everything installed places deters drafts of moisture dust.
- Comprehensive Guide to Door Replacement Rockville, MD: Fixing Cracked or Damaged Doors
- Essential Tools and Materials for a Smooth Door Replacement in Rockville, MD
- Step-by-Step Guide to Installing Doors in Rockville, MD for Beginners
- Beginner’s Guide to Door Installation Rockville, MD: Can You Replace a Door Frame Yourself?
- Comprehensive Guide to Door Repair Rockville, MD: Understanding Door and Frame Anatomy
- Exterior Door Installation Rockville, MD: The Ultimate Guide to a Seamless Process
- Important Tips for Door Repair Rockville, MD: Measuring for a New Door Handle
- Step-by-Step Guide to Door Repair Rockville, MD: How to Properly Install an Exterior Door